


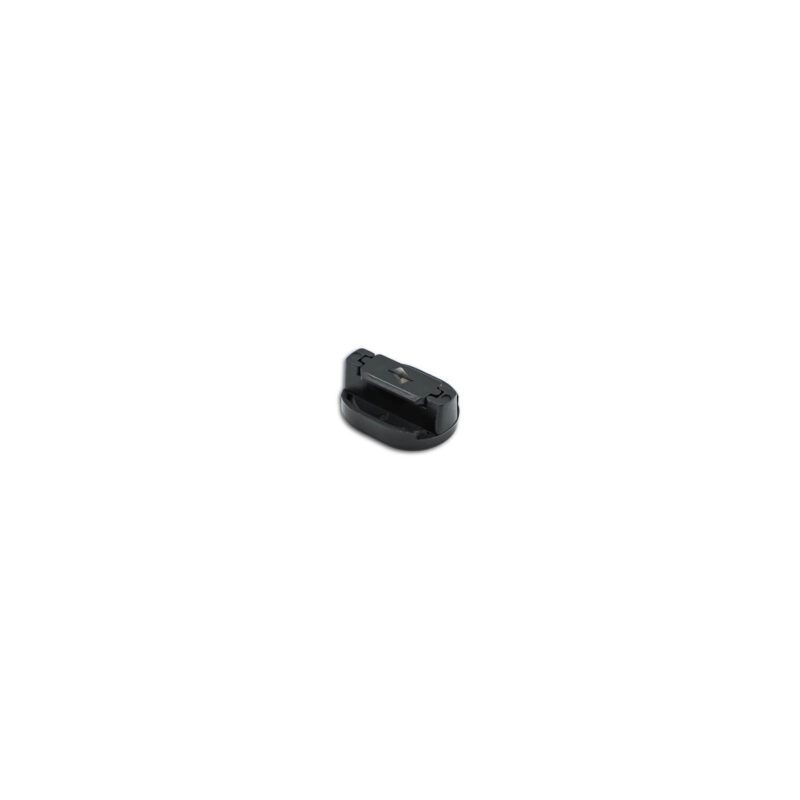
Universal Tuning Gauge
$69.00
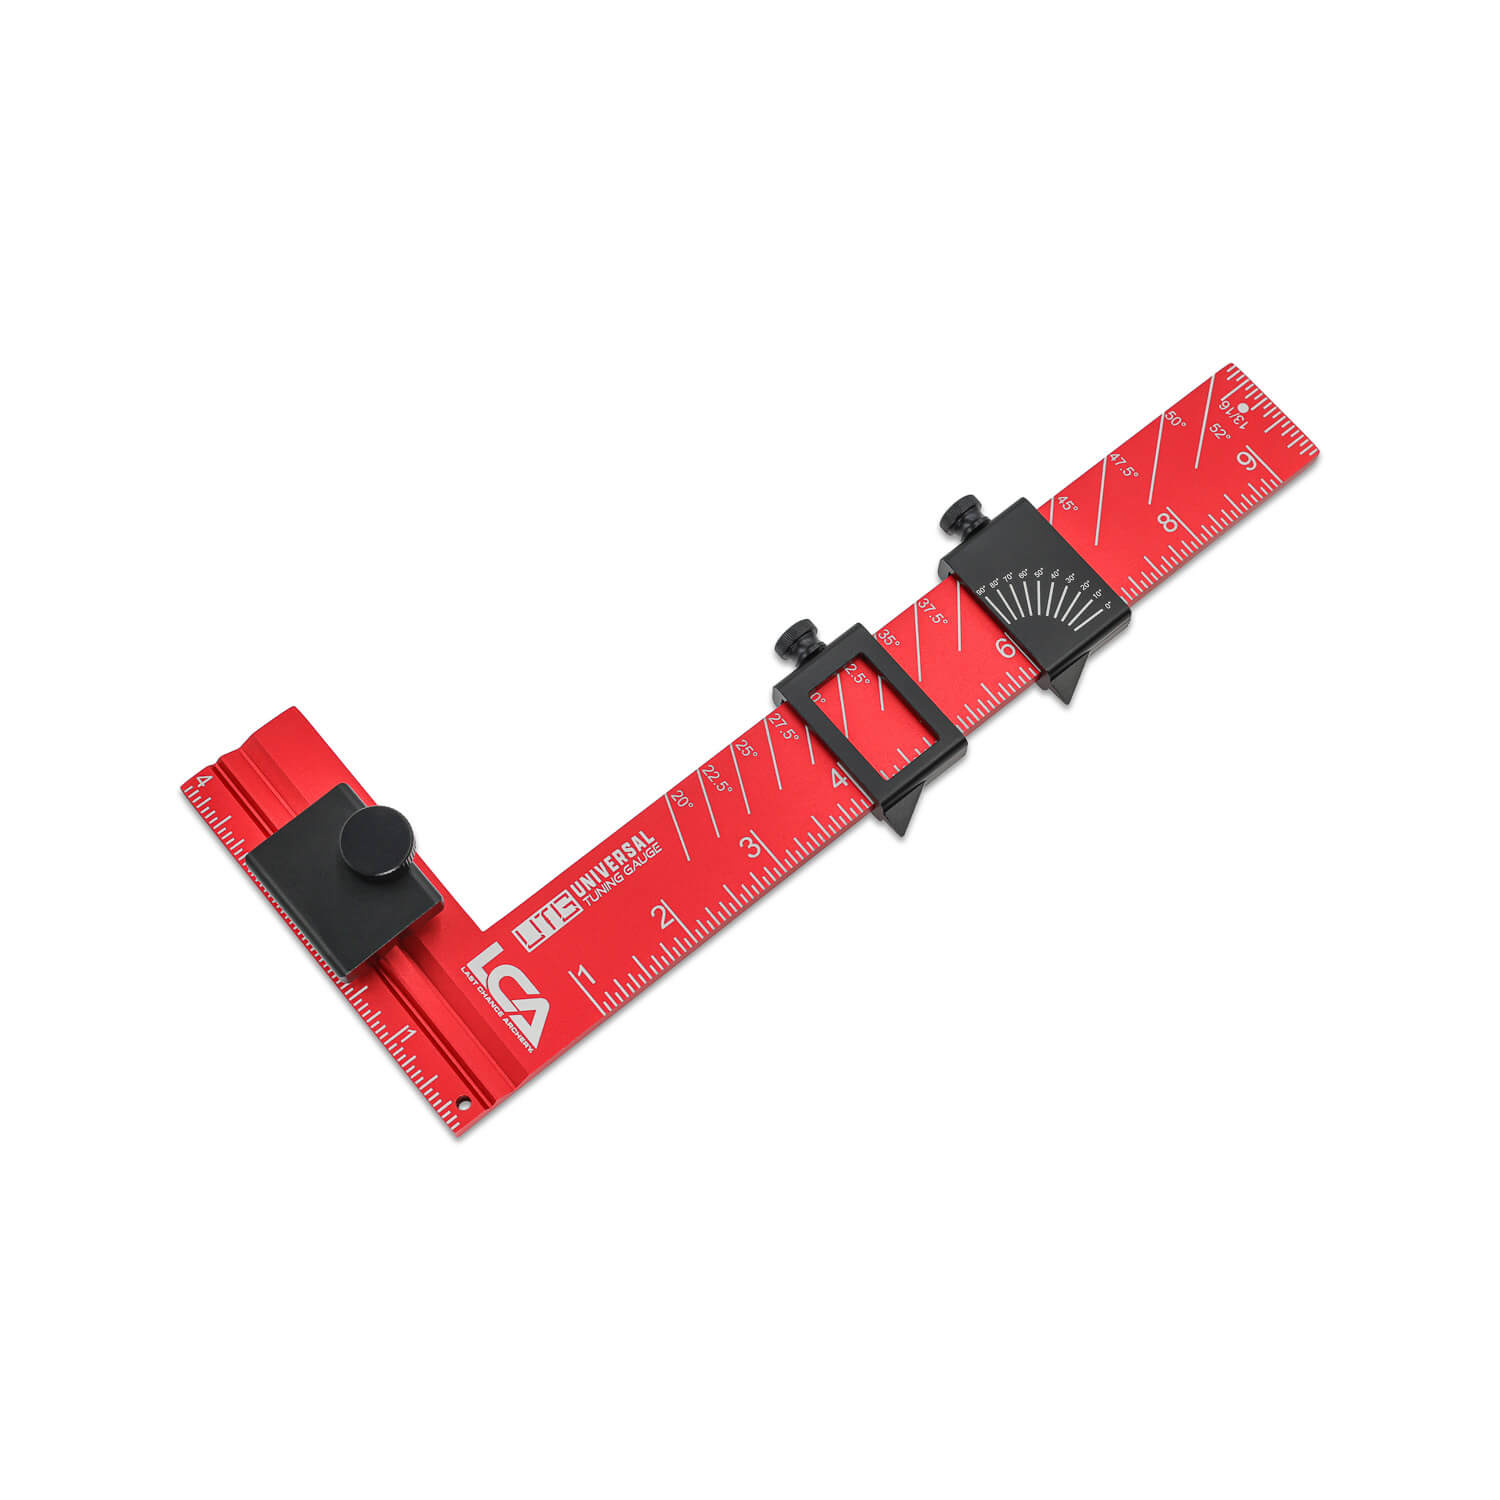
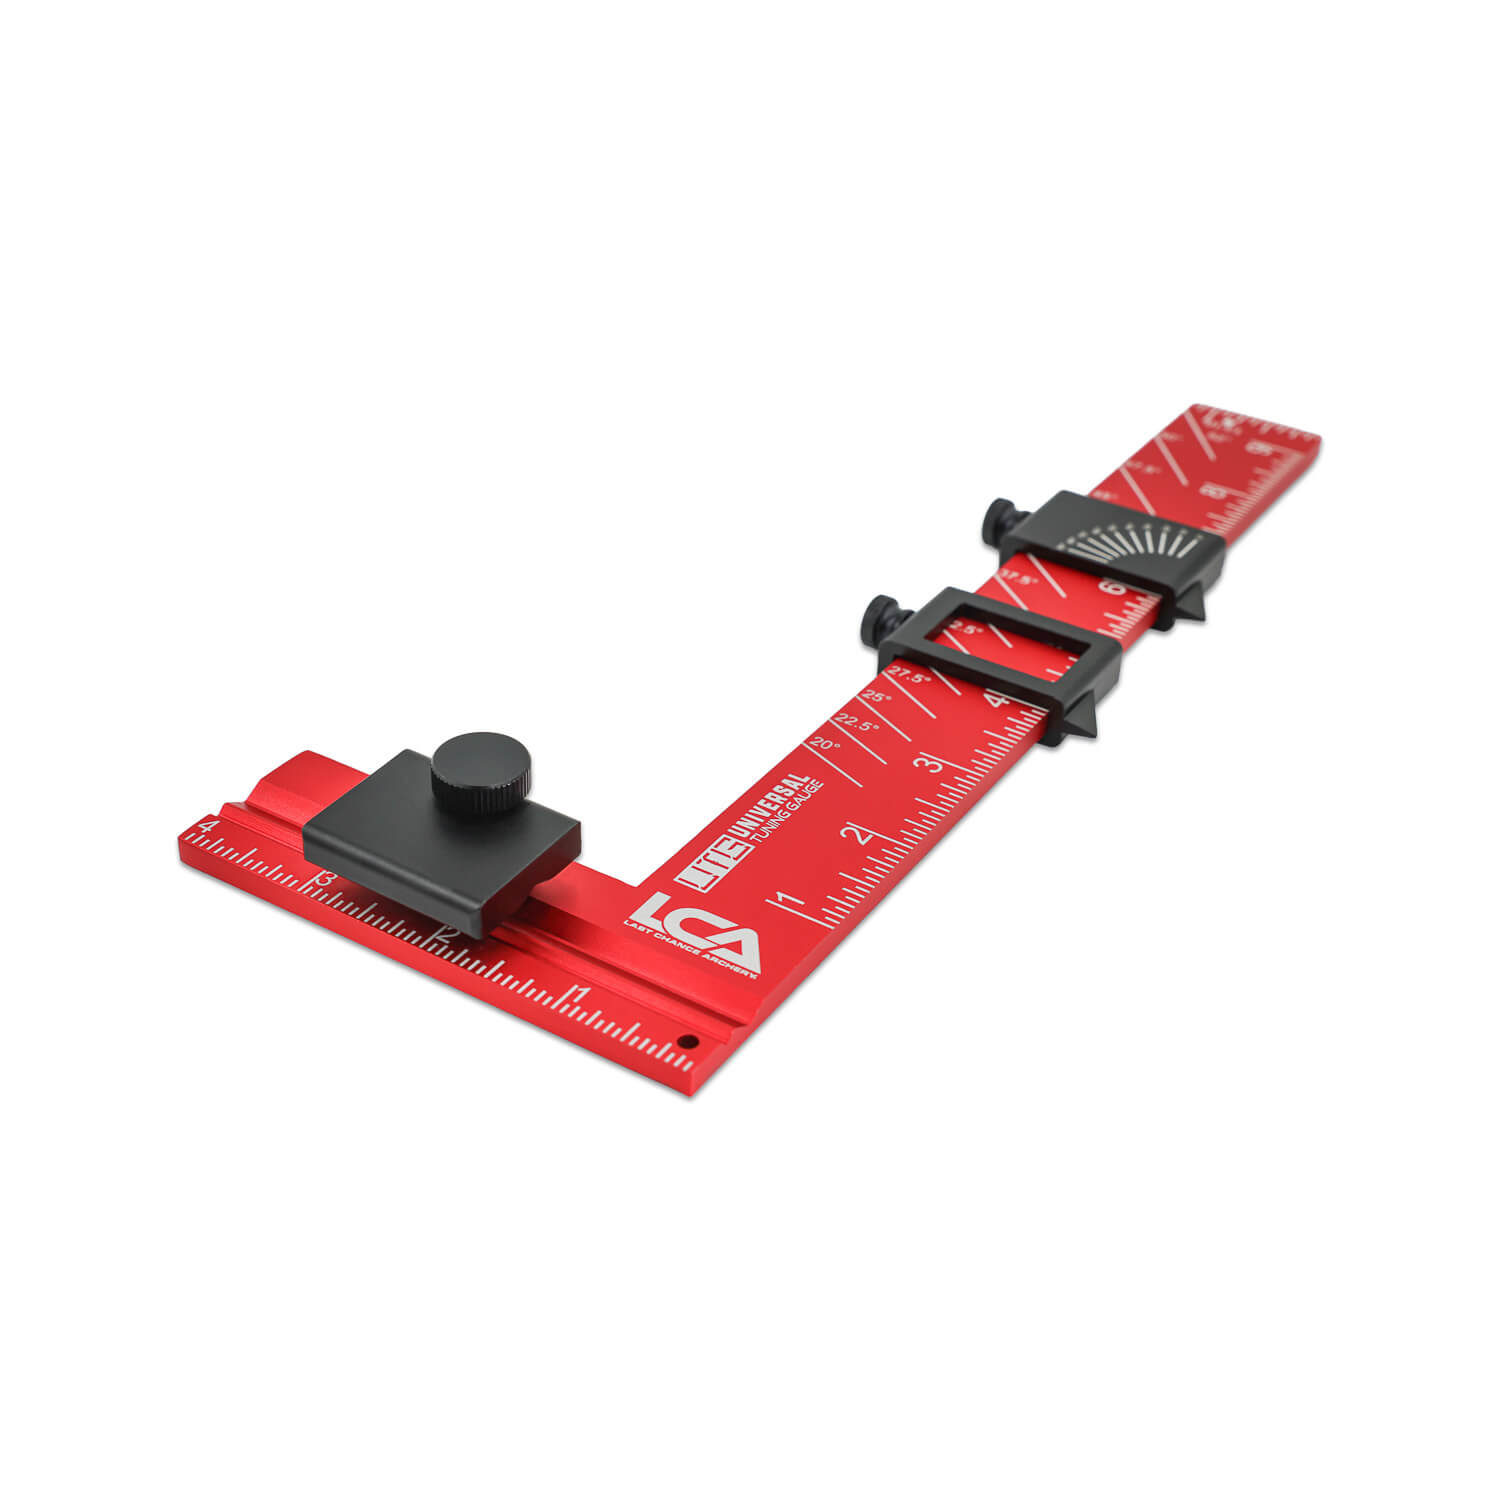
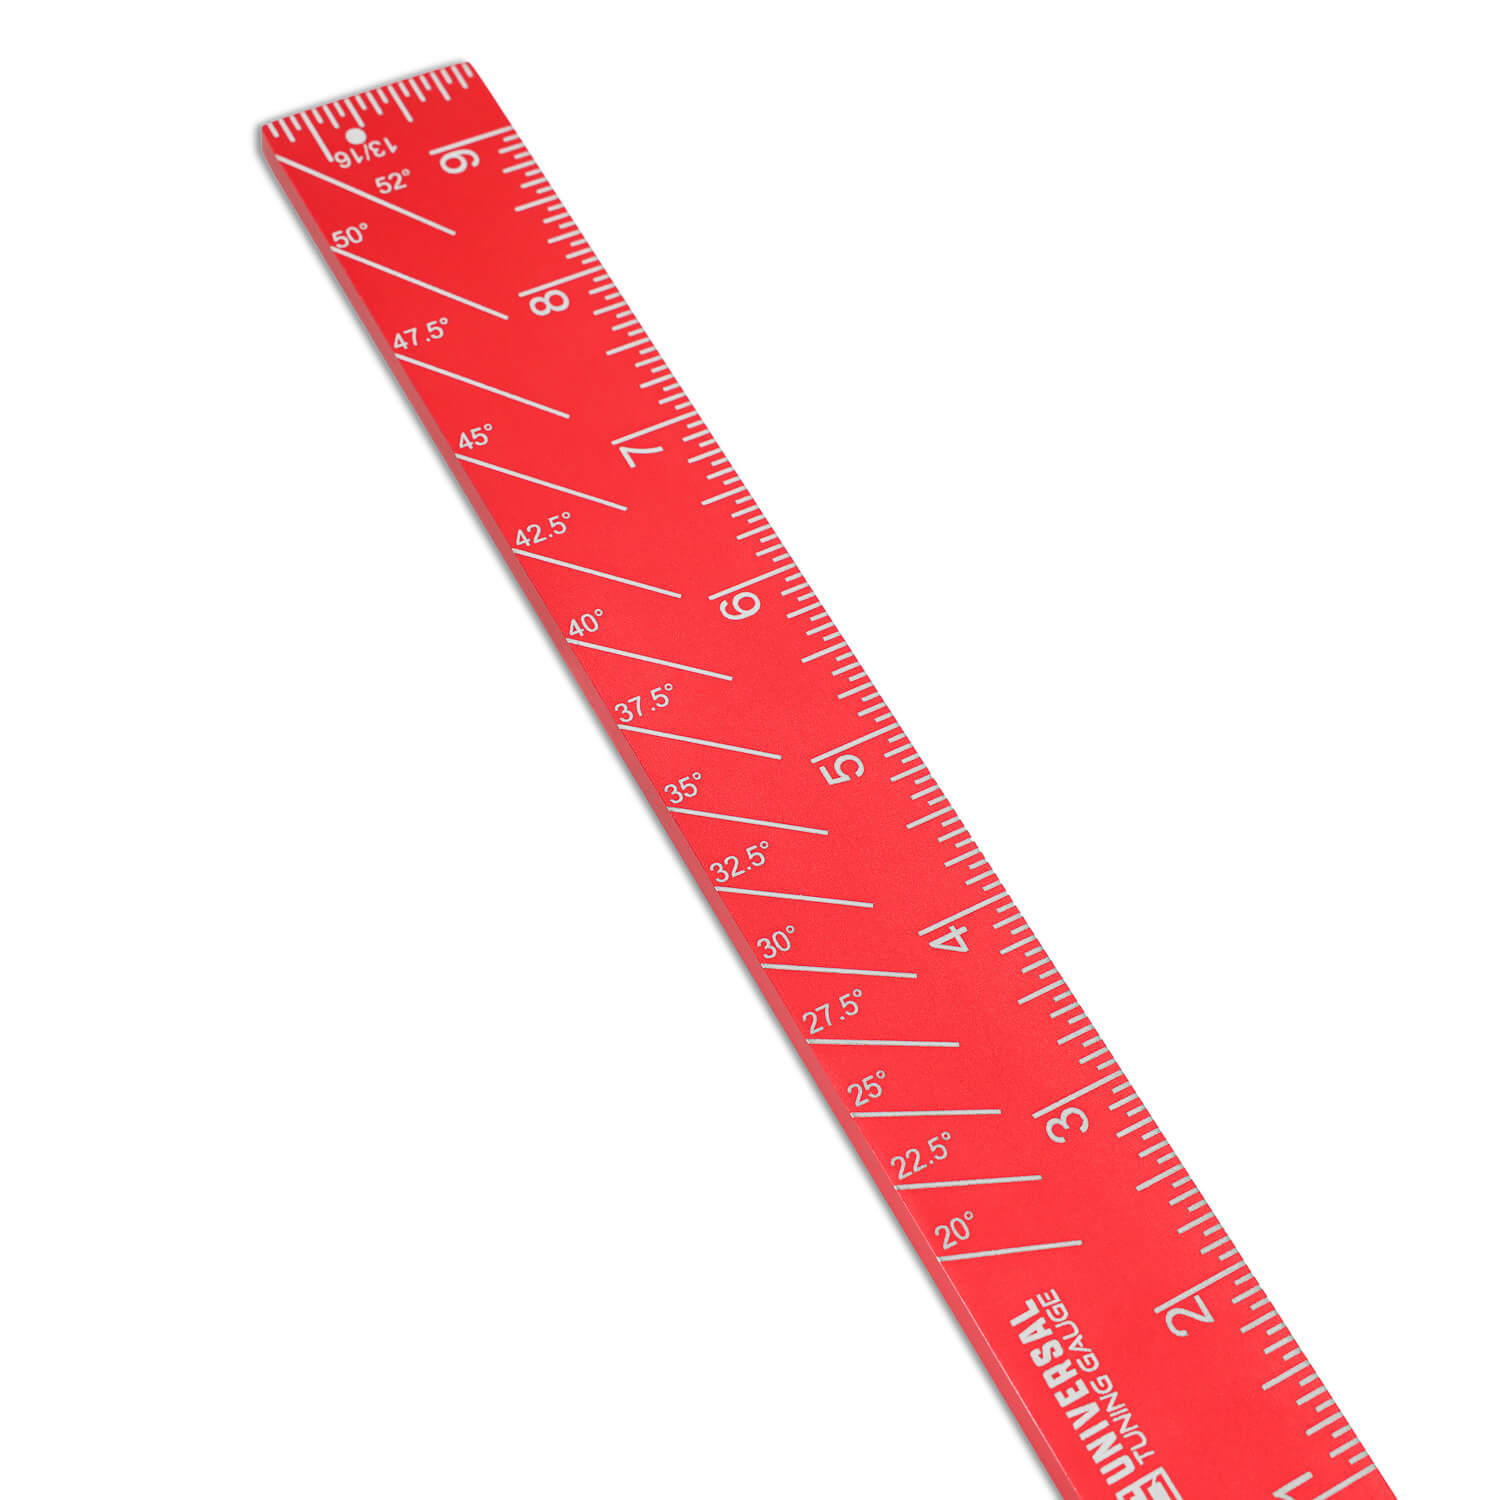
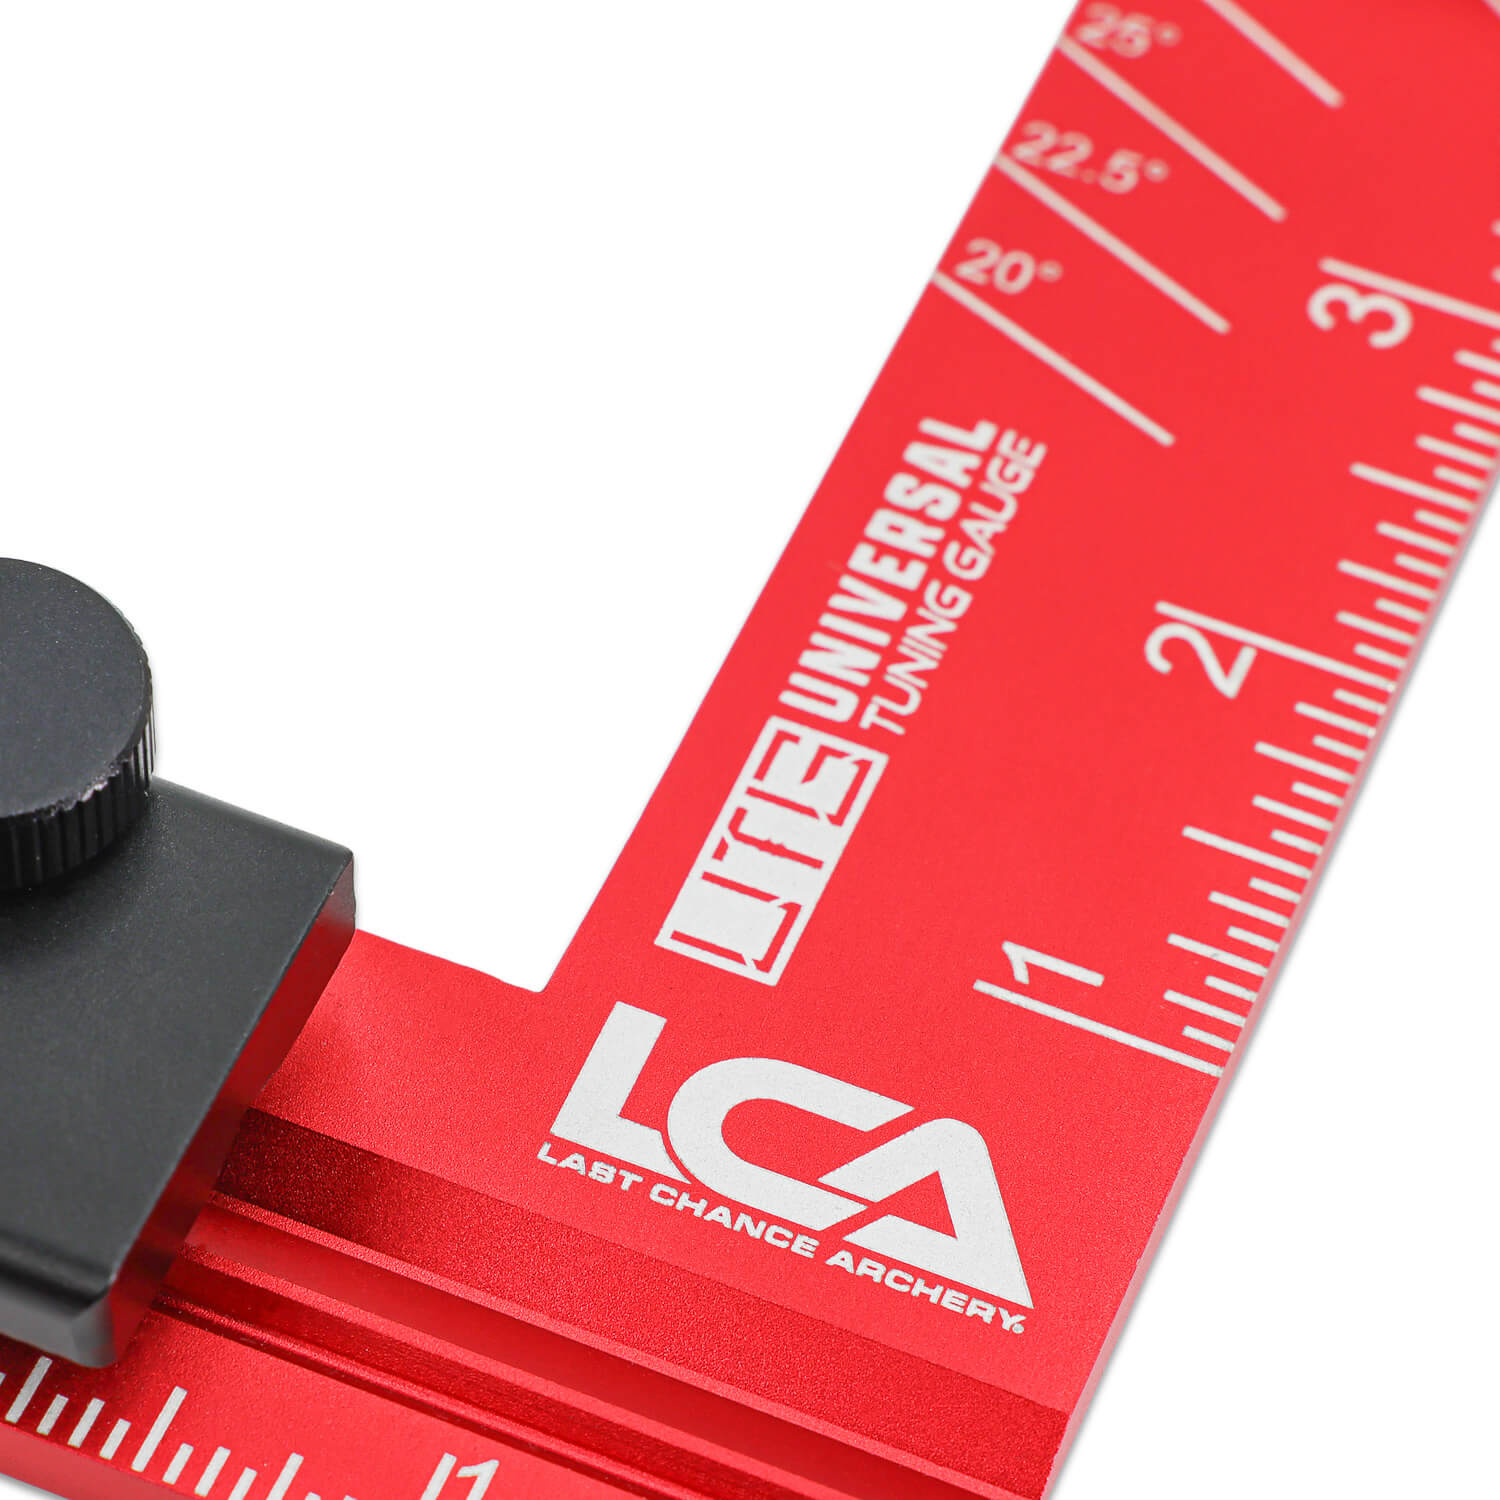
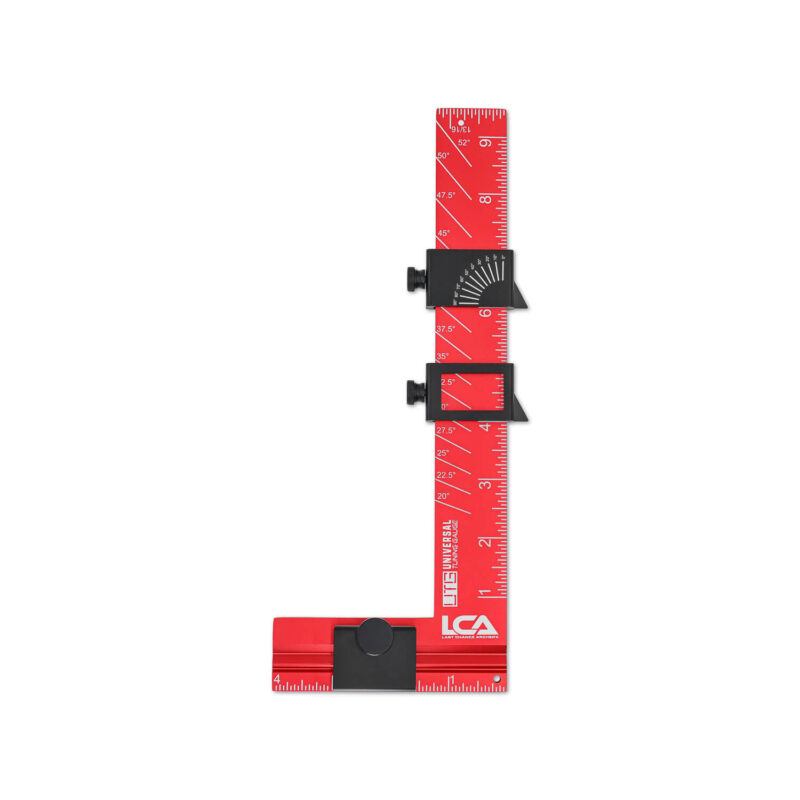
The Universal Tuning Gauge is for serious archers and bow technicians. It’s a multi-functional tool built for precision and versatility. Designed to measure string angles from 20° to 52°, it helps you select the right peep sight and achieve a perfect bow fit. Dual adjustable pointers allow accurate measurement of peep sight, nose button, or kisser button positions/heights, whether the bow is at rest or fully drawn. This is ideal for sight tape specs and overall reference points when switching between bows. An integrated 90° square makes it simple to set nock points and d-loops, as well as check brace height. The tool also offers precise nock height alignment directly related to the Berger hole, improving tuning accuracy. Each UTG includes a built-in 13/16″ center shot reference, blade angle markings, cam lean, tiller, static timing checks, and precisely marked ruler measurements. This all-in-one gauge simplifies the most critical tuning steps. Whether you’re in the shop or at the range, this tool delivers consistent, reliable results every time.
Lead Time: 1 week(s)
- Measures string angles from 20° to 52° for accurate peep sight selection and bow fit.
- Dual adjustable pointers help locate the peep, nose, and kisser button positions and heights, whether at rest or full draw.
- Provides precise nock height alignment referencing both the Berger hole and the string.
- Built-in 13/16″ center shot gauge allows for easy rest centering.
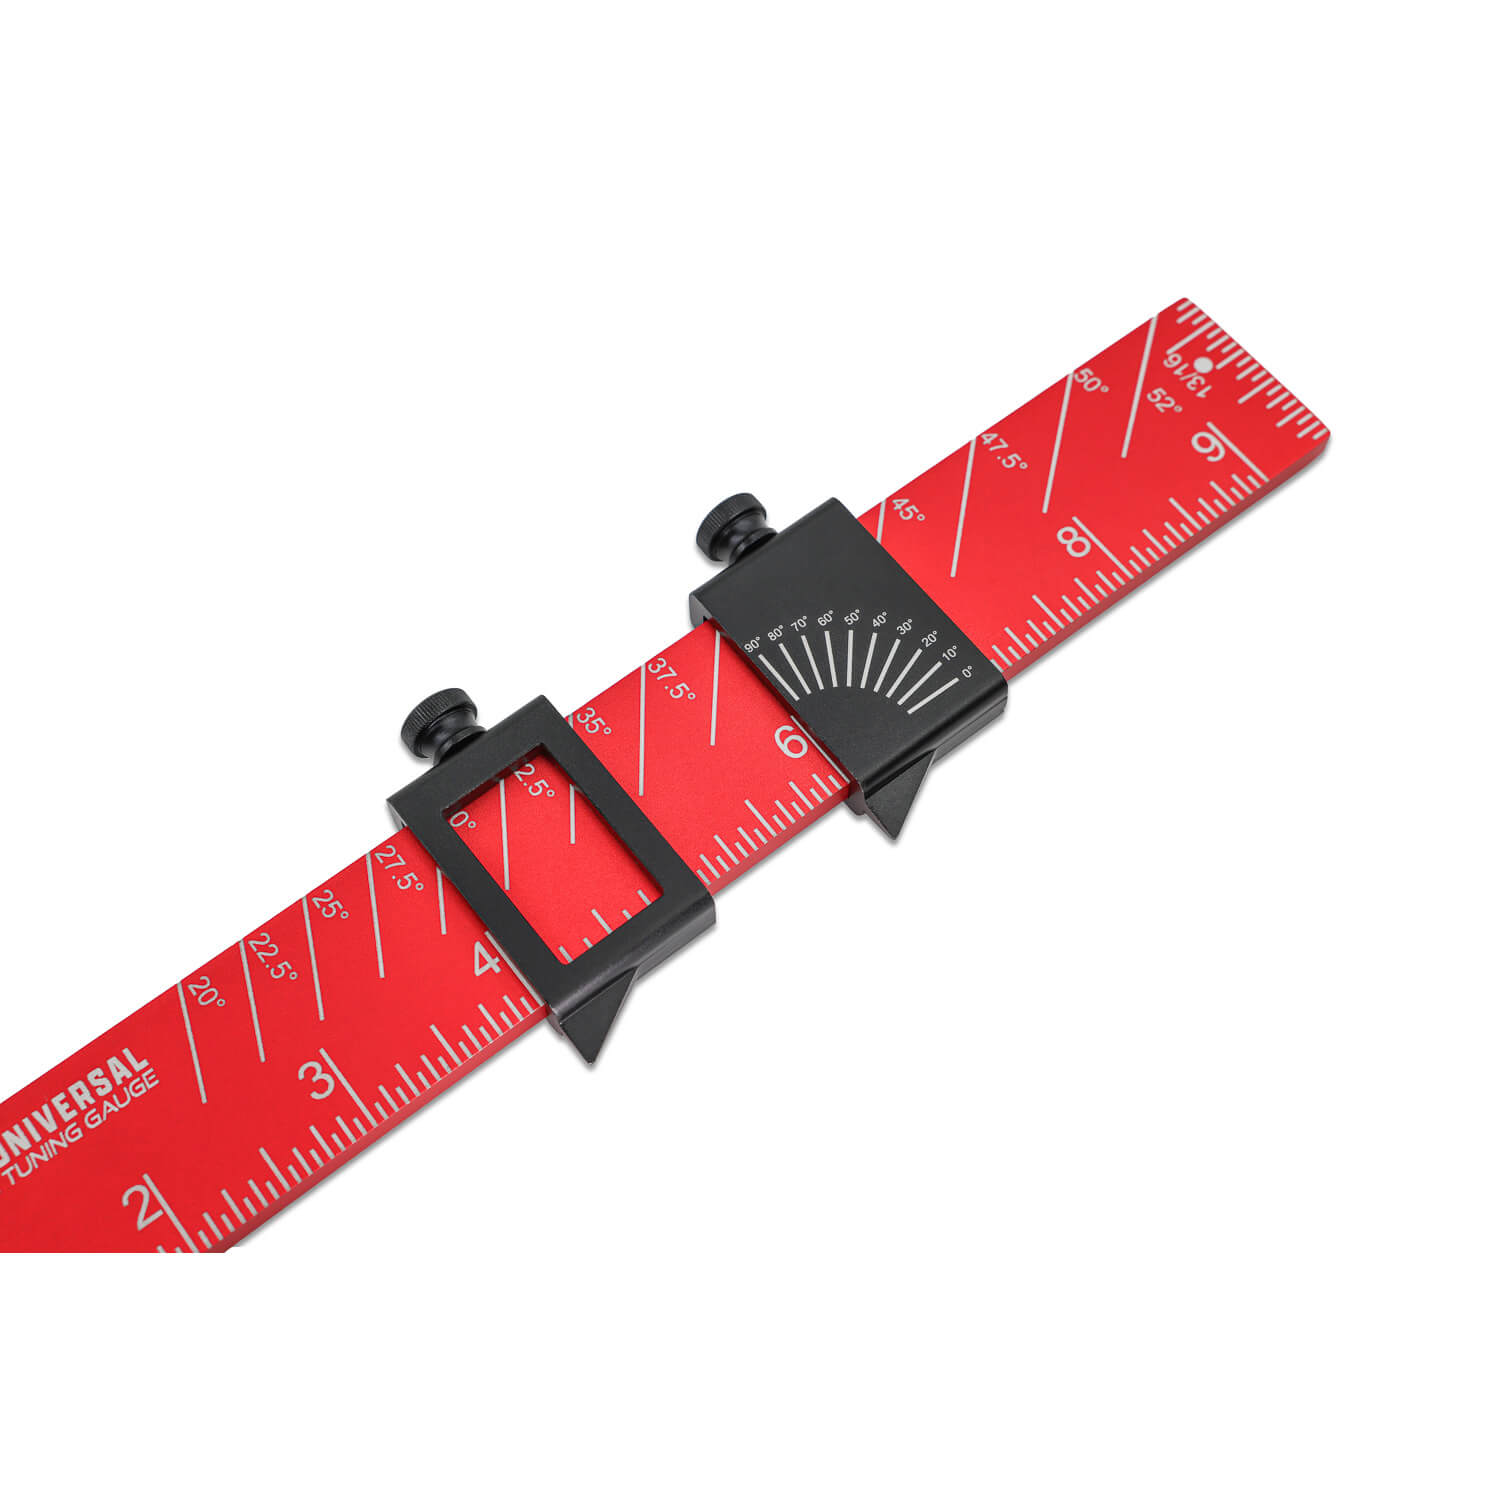
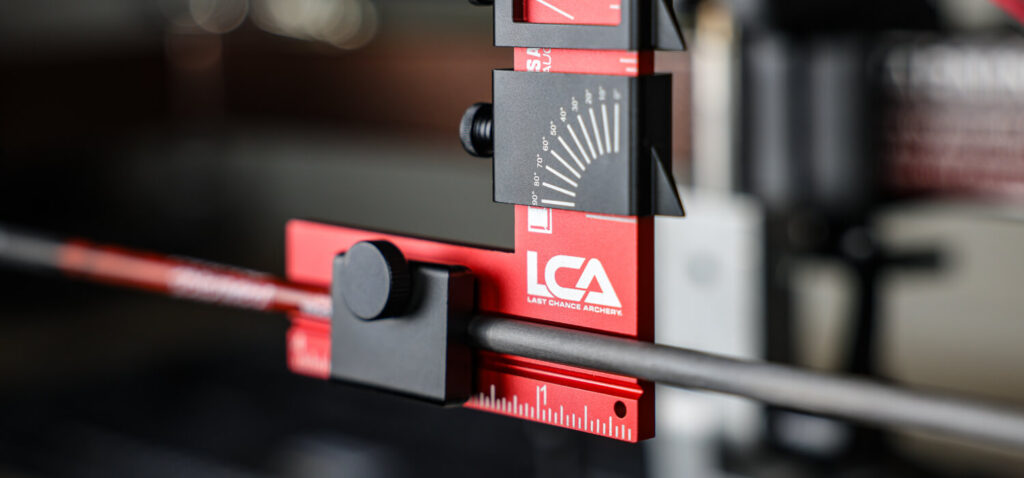
- Blade angle measurement markings range from 0° to 90°.
- Check cam lean, tiller, static timing, and more.
- An integrated 90° square assists in setting nock points, D-loops, and checking brace height.
- Ruler markings along the body enable versatile, multi-purpose measuring tasks.
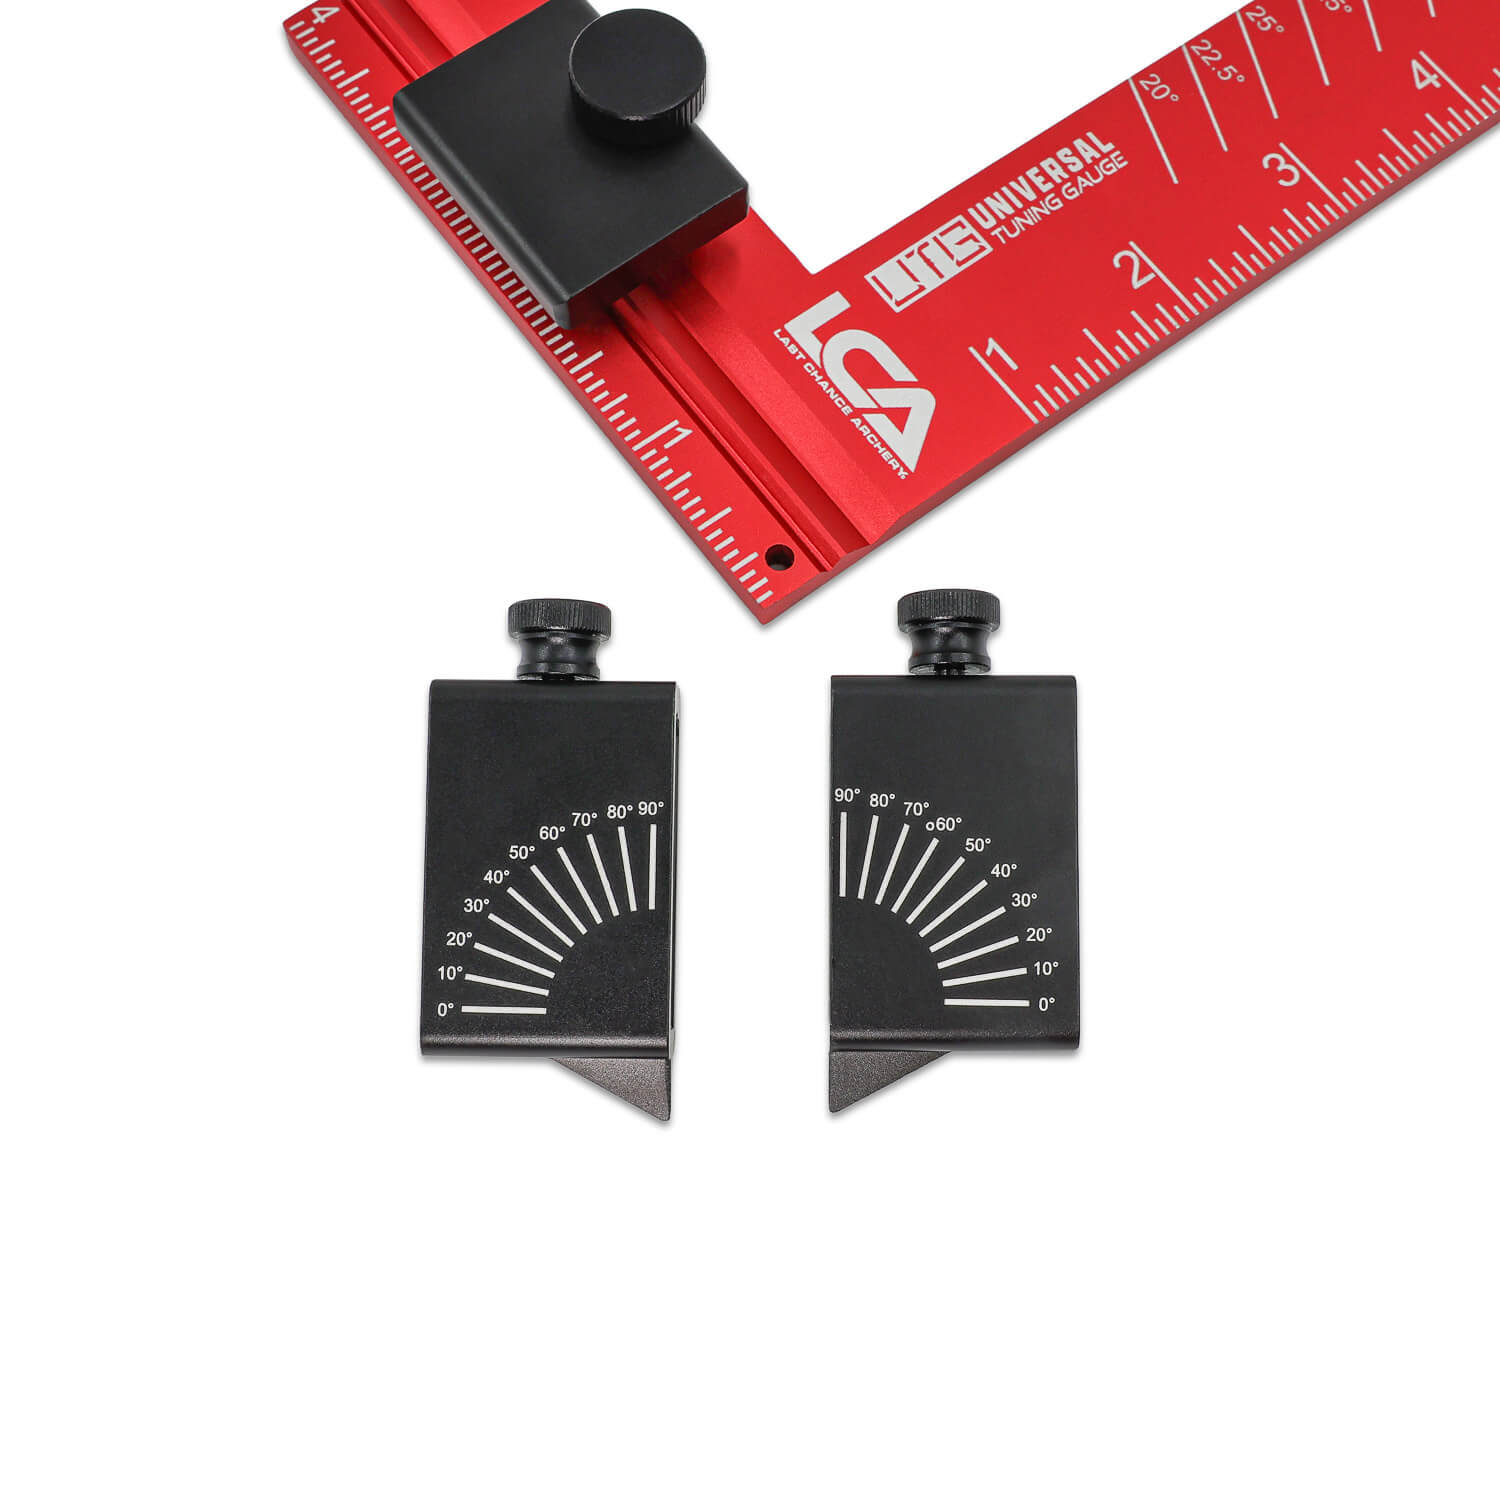
- 1 qty. Tuning Gauge Body
- 2 qty. Tuning Gauge Sliders
- Compound and Recurve
- Left and Right Hand
- Any arrow shaft type or diameter.
Why String Angle Matters
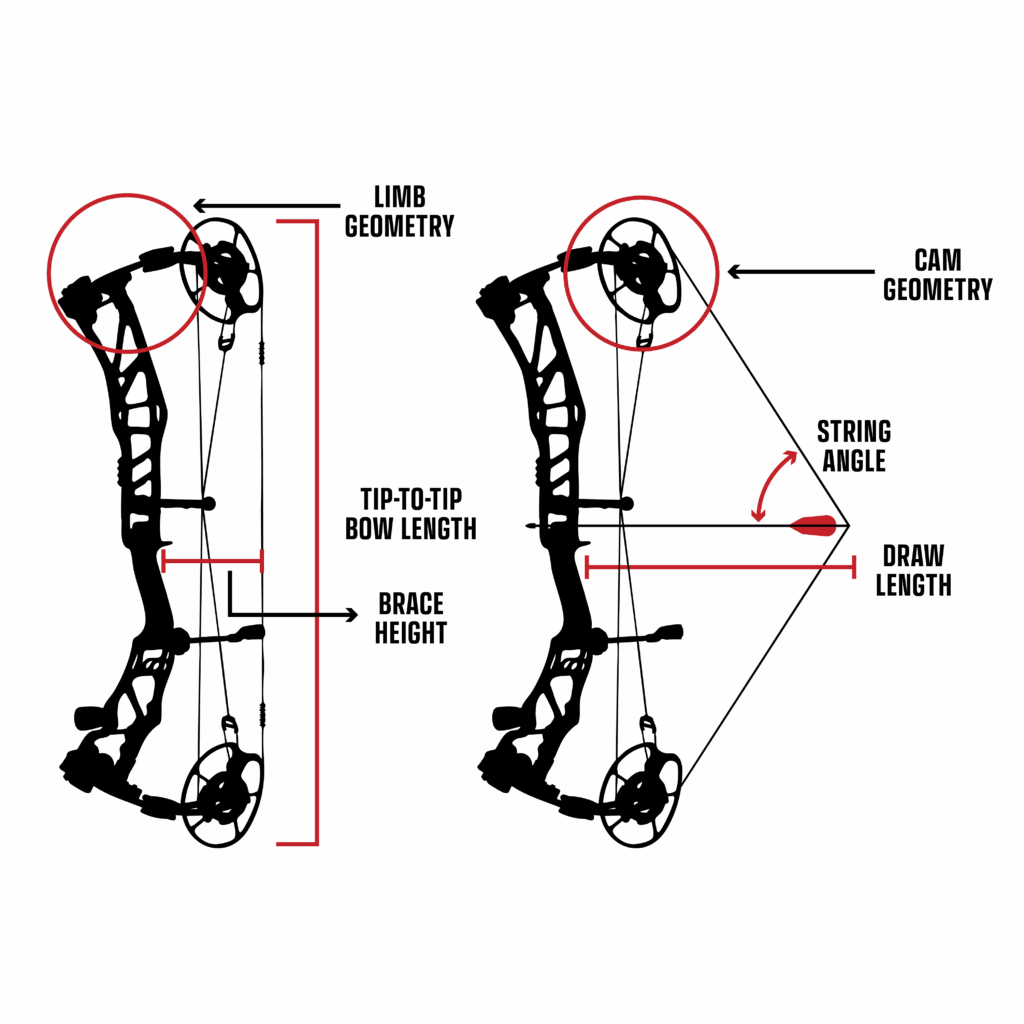
String angle plays a crucial role in how a bow fits, aims, and feels at full draw. String angle is determined by overall tip-to-tip bow length when at full draw, which can be affected by your draw length, brace height, and (the key) limb or cam geometry. All of which influence the peep angle needed, peep height, and anchor point placement. If your peep angle or height isn’t correct, your shots can feel awkward and inconsistent. Shorter axle-to-axle bows tend to have steeper string angles, which may require a higher peep position, while longer bows might need a lower one.
Modern bow designs have improved this balance. Axle-to-axle length alone no longer provides the whole picture. Measuring the actual string angle and confirming proper peep angle, placement, and height ensures a natural anchor, clear sight picture, and consistent accuracy for your specific setup.
Thanks to advances in bow technology, many archers who prefer longer axle-to-axle bows can now shoot shorter ones with the same comfort and stability at full draw.
Trusted by Professionals
Professional hunters and tournament archers worldwide trust the Universal Tuning Gauge to help create their most accurate setups.
Archery Innovation
Innovation isn't just part of what we do—it defines it. With the Universal Tuning Gauge, we're redefining the standard for precision in modern archery.
Strong & Durable Materials
The Universal Tuning Gauge is built like a tank, so you can fully trust that this product will stand the test of time.
Built with Purpose
The Universal Tuning Gauge is built with a specific purpose in mind: to make things easier for the archer.
Universal Tuning Gauge (UTG) — Step-by-Step User Guide
For full detailed instructions, please refer to the videos tab on this product page. The instructions below are generic and might not cover every feature, but the video instructions cover each feature in depth.
Recommended Tools
Universal Tuning Gauge
Recommended Draw Board – LCA Draw Board 2.0
Recommended Bow Vise – Revolution Vise
Black or Grey Sharpie
Purpose
Measures string angles from 20° to 52° for accurate peep sight selection and bow fit.
Dual adjustable pointers help locate the peep, nose, and kisser button positions and heights, whether at rest or full draw.
An integrated 90° square assists in setting nock points, D-loops, and checking brace height.
Provides precise nock height alignment referencing both the Berger hole and the string.
Built-in 13/16″ center shot gauge allows for easy rest centering.
Blade angle measurement markings range from 0° to 90°.
Check cam lean, tiller, static timing, and more.
Ruler markings along the body enable versatile, multi-purpose measuring tasks.
Preparation & Safety
Make sure the bow is in good condition and ready for tuning.
Check peep angles, peep height, and nose/kisser button heights at full draw using a draw board. The LCA Draw Board 2.0 is the perfect tool for these measurements.
Mount the bow in a bow vise for tasks that don’t require it to be at full draw. The Revolution Vise is the best tool for these jobs.
Always point the bow in a safe direction during the tuning process.
Never draw the bow by hand with the Universal Tuning Gauge installed.
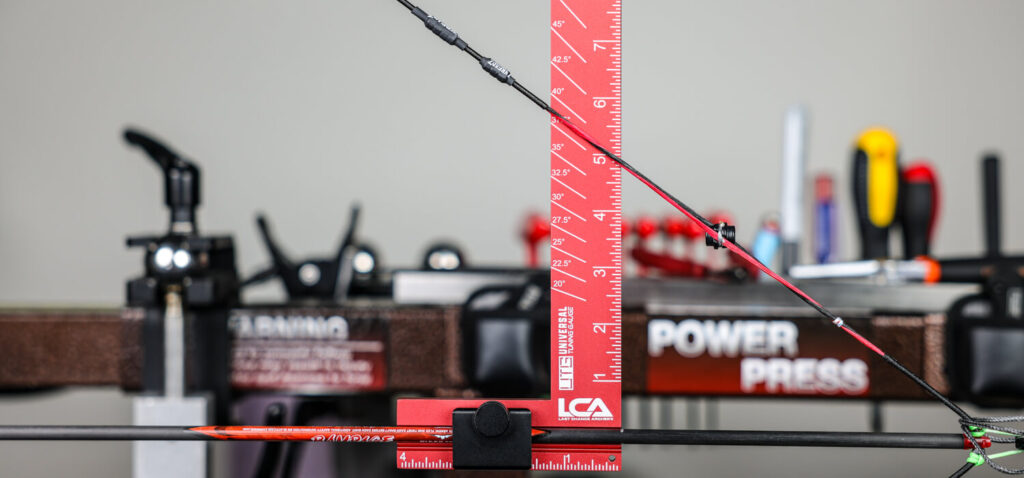
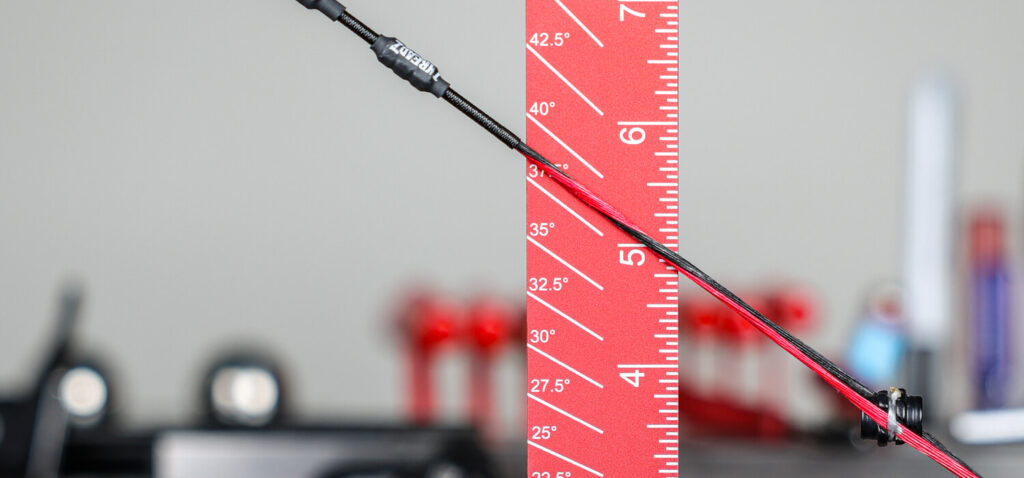
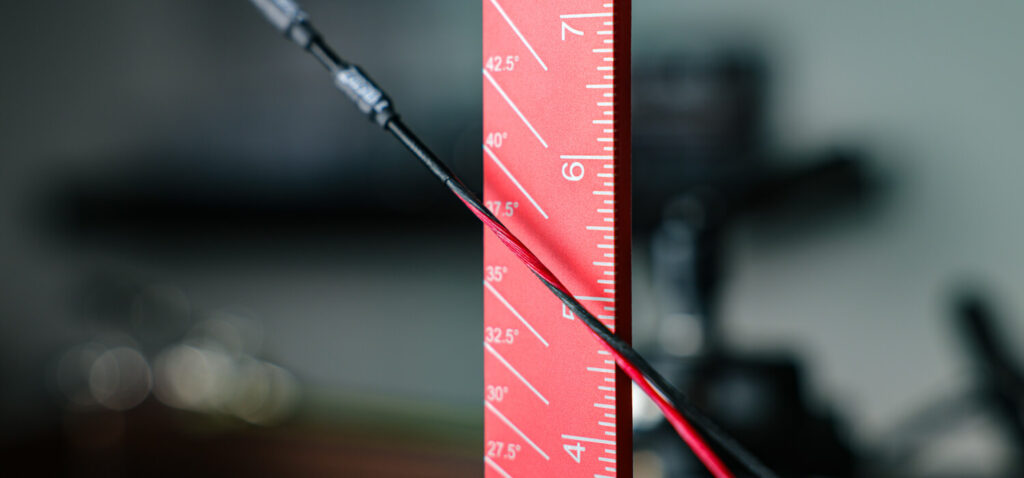
Measuring String Angles
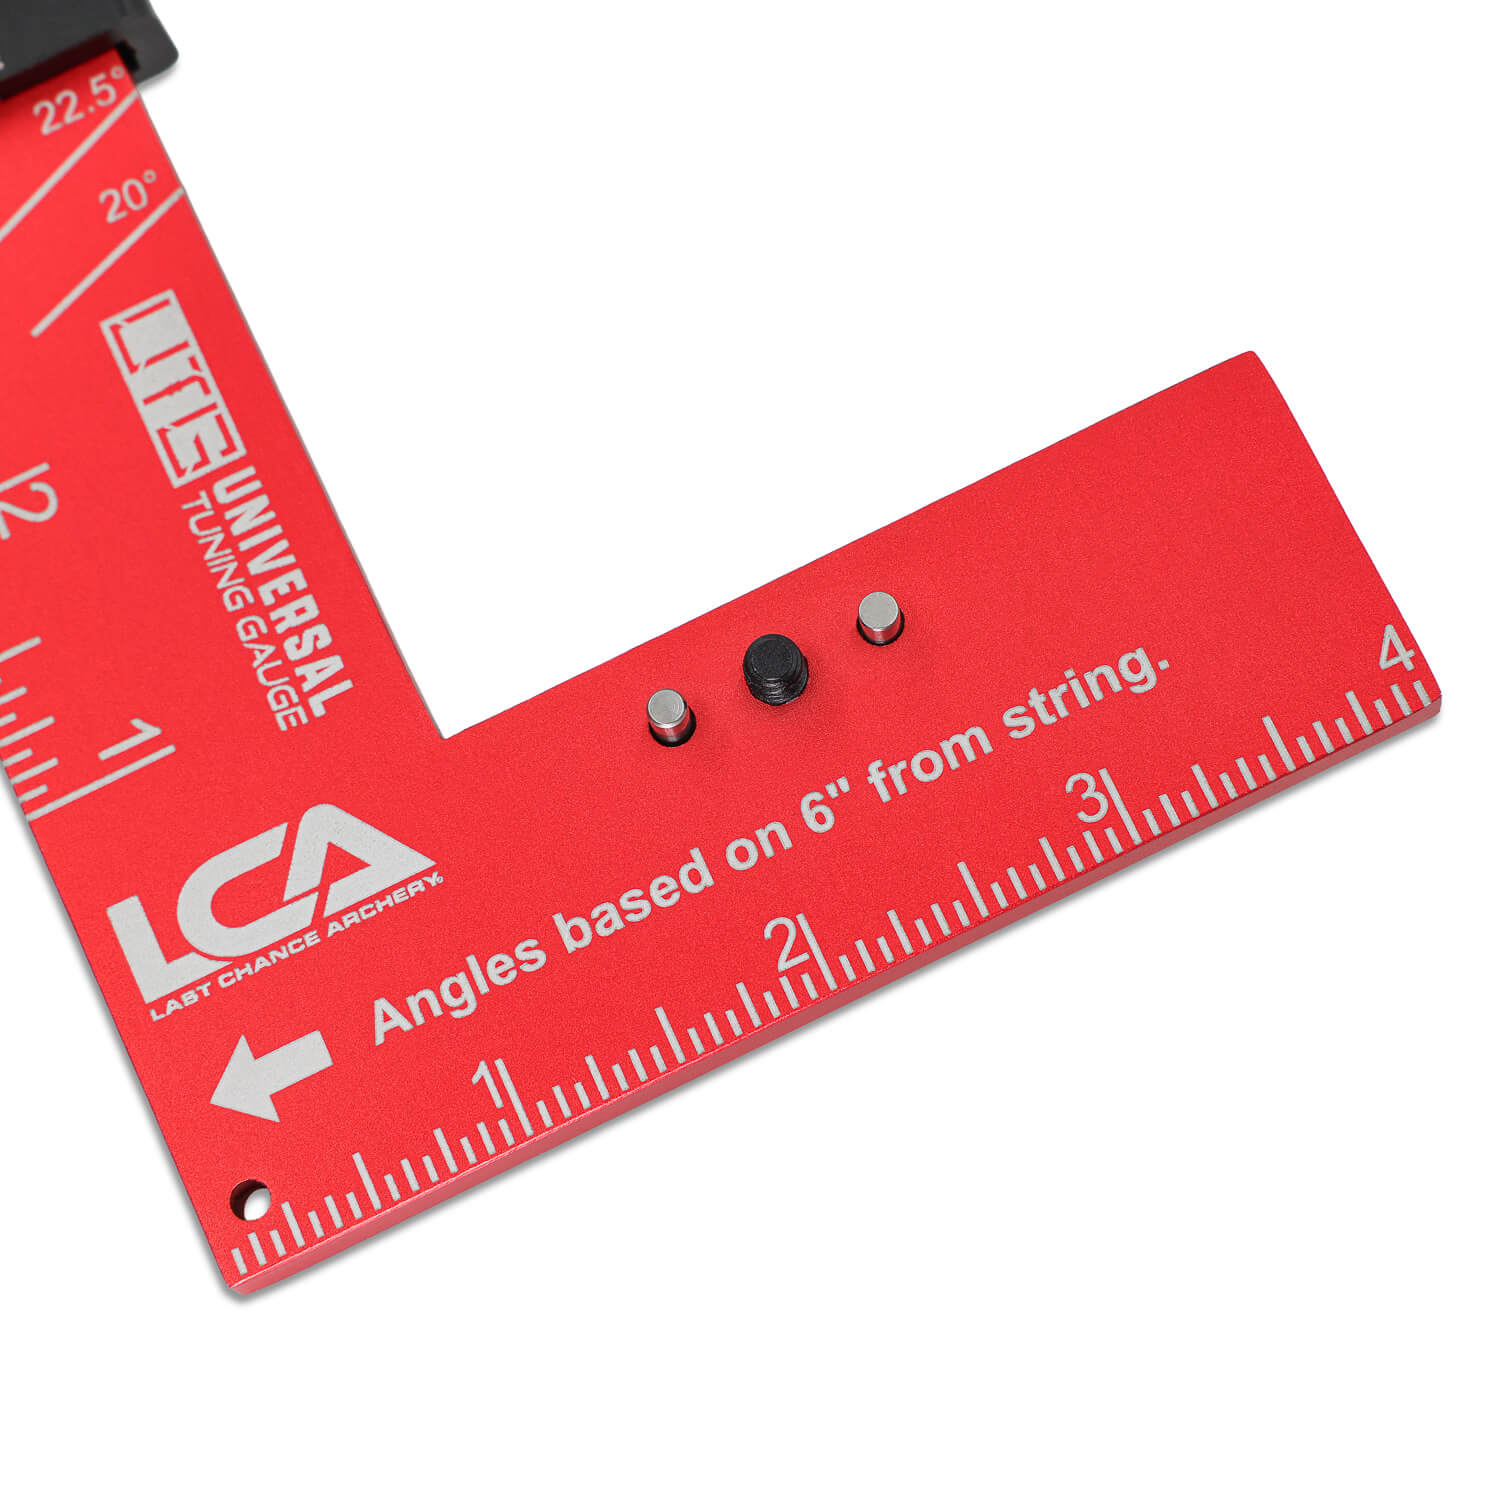
String angle measurements are only accurate if you mounting the UTG 6 inches from the nock throat.
Take your arrow, measure from the throat of your nock, and mark 6 inches on the arrow shaft.
Install the UTG on the arrow by sliding the arrow inside the UTG clamp.
Align the back of the UTG with the 6-inch mark on your arrow shaft and clamp the UTG to the arrow.
On the UTG, there’s a printed arrow/pointer showing which edge/surface to align with the 6″ mark on the arrow shaft.
Align the back of the UTG directly on the 6-inch mark you made on the arrow shaft.
It can help to use an arrow without vanes, just to ensure clearance, but it’s not required.
Secure your bow onto the draw board, a great option is the LCA Draw Board 2.0.
Draw the bow to full draw using the draw board, making sure the safety loop is on in case of a d-loop failure.
Slide the arrow into position inside the bow with the UTG installed.
The bow string should align just in front of the UTG with the bow at full draw, allowing you to view and measure your bow’s string angle using this method.
Why String Angle Matters
String angle changes due to both draw length and cam designs. Knowing this number helps compare setups, optimize peep height, choose the right peep angle, and improve anchor-point comfort. As bow design has advanced over the past 10+ years, so have string angles and bow fit. Shorter axle-to-axle bows from a decade ago, with very steep string angles, now have more comfortable angles thanks to design improvements for the same length bows. It’s no longer enough to just look at axle-to-axle length; measuring the string angle itself is crucial to determine fit, pick the right peep, and see if the angle will work for you. With advances in bow technology, someone who usually prefers a longer axle-to-axle bow can likely shoot a shorter one and still feel the same full-draw.
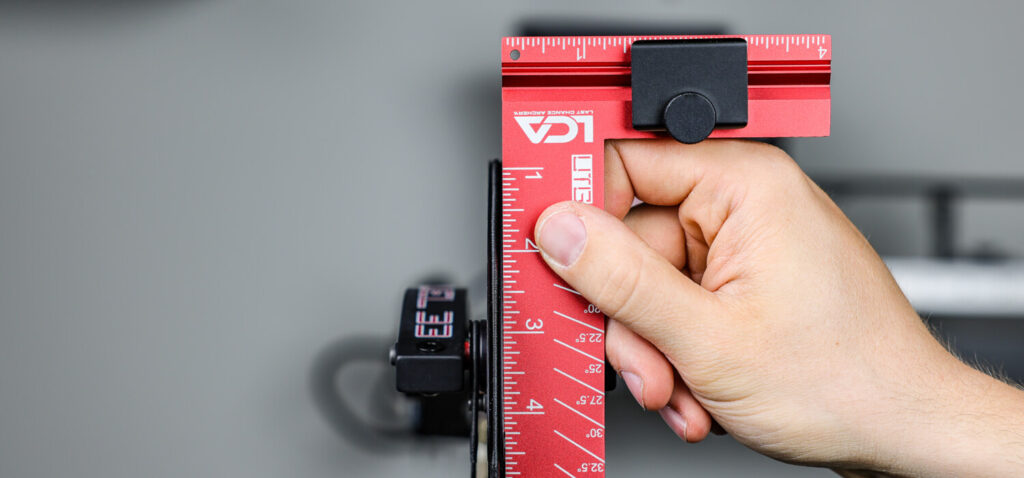
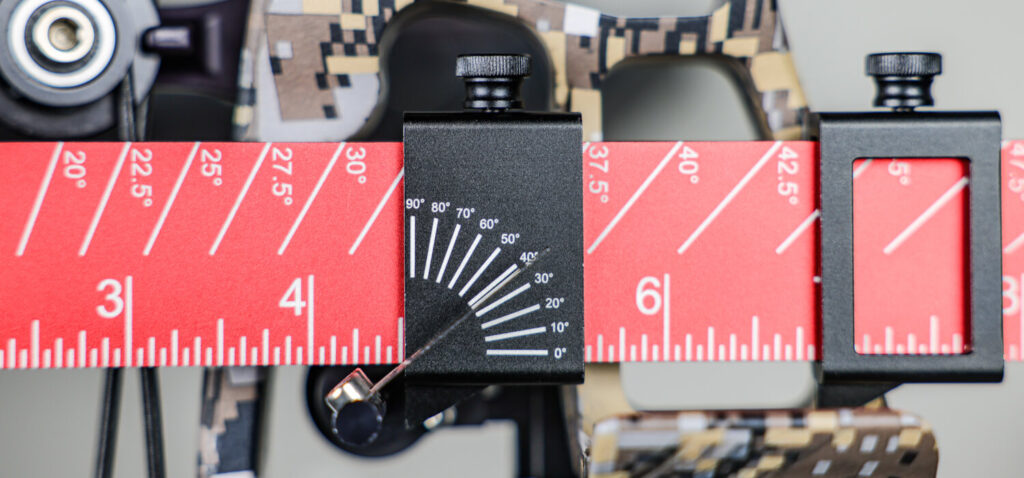
Measuring Peep Height
It’s best to perform these measurements at full draw.
Secure your bow onto the draw board, with the LCA Draw Board 2.0 being a great option.
Install the UTG on the arrow, sliding the arrow inside the UTG, then tighten the clamp.
Slide the UTG until the top pointer is directly in line just in front of your peep.
Adjust the pointer up or down until the tip is centered with your peep sight.
Check the ruler scale pointer — that’s your peep sight height measurement.
Measuring this is useful for building sight tapes, setting up a new bow, and matching your peep height on the new bow with your current setup.

Measuring Nose/Kisser Button Heights
It’s best to perform these measurements at full draw.
Secure your bow onto the draw board, with the LCA Draw Board 2.0 being a great option.
Install the UTG on the arrow, sliding the arrow inside the UTG, then tighten the clamp.
Slide the UTG until the 2nd lower pointer is directly in line just in front of your nose or kisser button.
Adjust the pointer up or down until the tip is centered with your nose or kisser button.
Check the pointer on the ruler scale — that’s your measurement for nose or kisser button position on that bow.
Knowing this measurement helps when setting up a new bow and ensures your nose or kisser button is in the same spot as on your current bow, making setup quicker and more consistent from the start.
Setting Precise Nock Points
Place your bow in a bow vise, like the Revolution Vise.
Keep the bow at rest and do not draw the string.
Remove the dual points from the UTG and set them aside.
Attach the UTG to your arrow and slide it so that the back edge of the UTG lines up with the throat of your nock.
Nock the arrow with the UTG installed. This should align the UTG vertically with your bowstring.
This creates a perfect 90º square, allowing you to slide the arrow shaft up and down the string.
The UTG will stay aligned and square with your string; the arrow will point outward and cross the shelf on the riser.
Move the arrow up or down the string, keeping the UTG square with the string, until the arrow is level with the Berger hole or your preferred position.
Once the arrow is in the correct spot on the string, mark the underside of the nock for your nocking point installation.
Remove the arrow and the UTG, then you’re ready to tie on the nocking point.
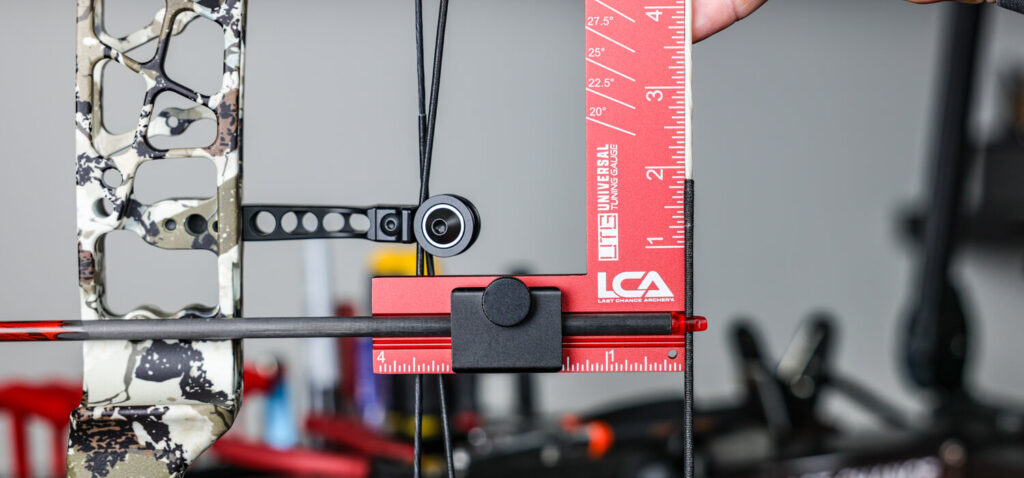
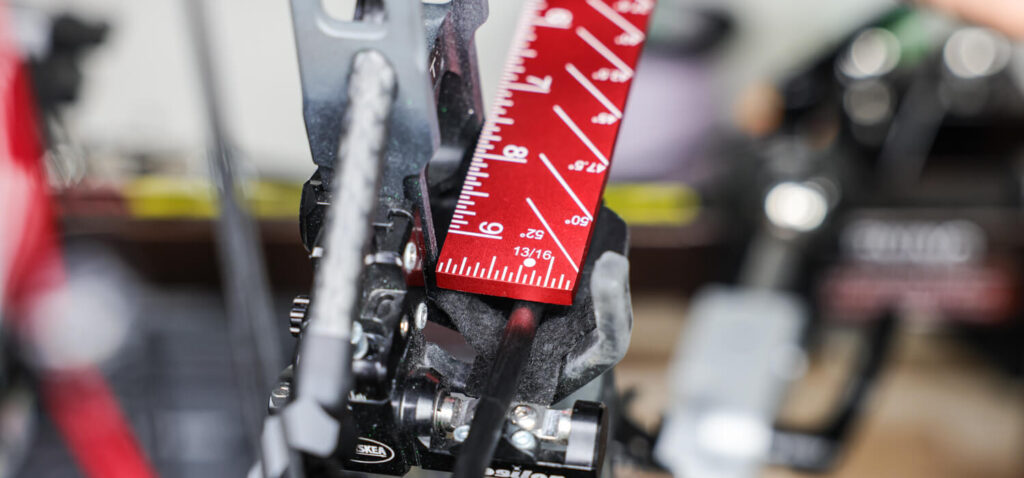
Setting Centershot
Place your bow in a bow vise, like the Revolution Vise.
The UTG includes 13/16″ centershot markings for both left and right-hand bows.
Align the UTG with the inside of the riser and ensure the 13/16″ scale measures outward from inside the riser.
Adjust your arrow rest so that the center point aligns with the 13/16″ mark on the UTG.
This will be your starting point; then proceed with paper tuning and fine-tuning your bow.
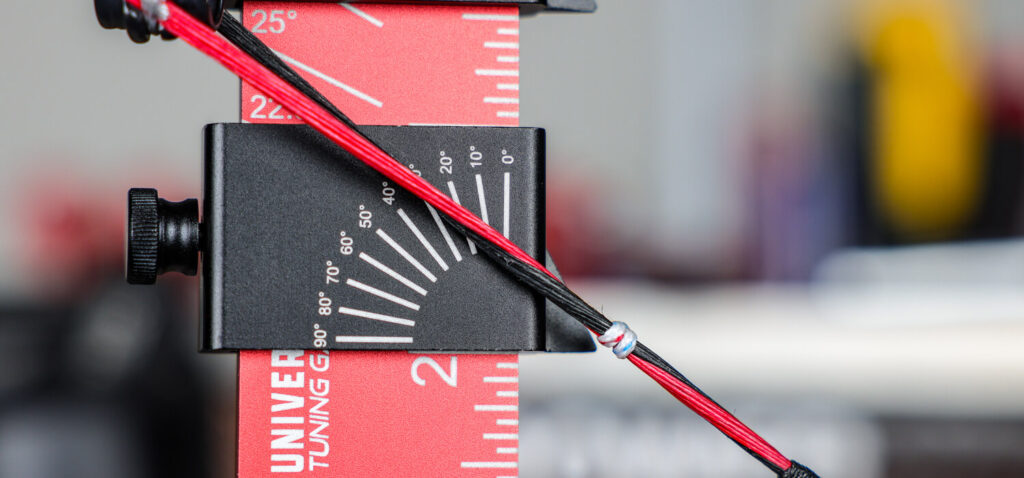
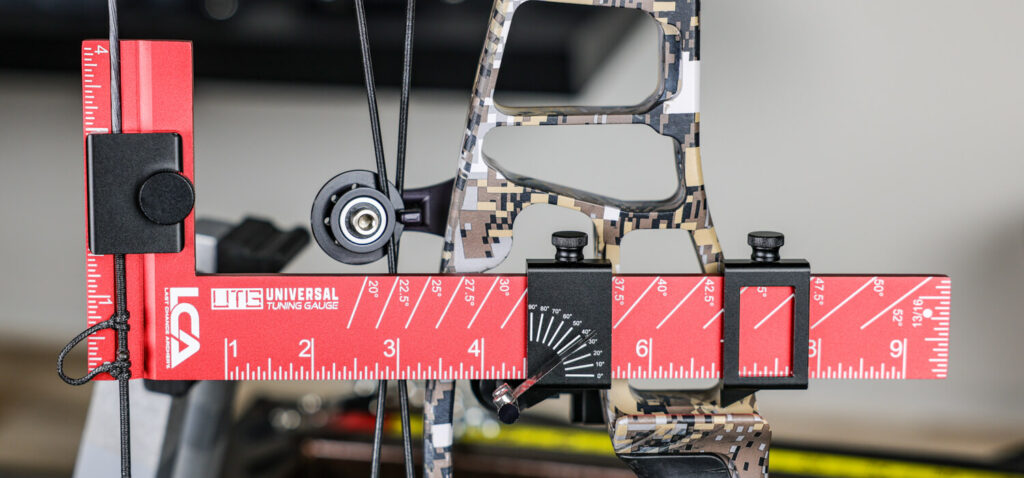
Measuring Blade Angles
Place your bow in a bow vise, like the Revolution Vise.
This can be done in several ways depending on your setup.
Mount the UTG to your string by inserting the string into the string groove on the UTG, then tighten the UTG clamp.
The UTG extends outward, positioning the pointers directly behind the arrow rest blade to show the correct blade angle measurements.
Each pointer has blade angles; one is designed for LH bows, and the other for RH bows. Use the appropriate pointer for your setup.
Alternatively, you can remove the pointer from the UTG, hold it behind your blade, and make sure it’s level with your riser, which will also indicate the blade angle.
Measuring Cam Lean
Place your bow in a bow vise, like the Revolution Vise.
The UTG can also serve as a basic 90-degree square. Hold the UTG against your cam and view the bow from the backside. Any misalignment between the UTG, held against the cam, and the bowstring indicates cam lean. It’s important to tune your bow through paper tuning and other methods to determine if cam lean adjustments are necessary.
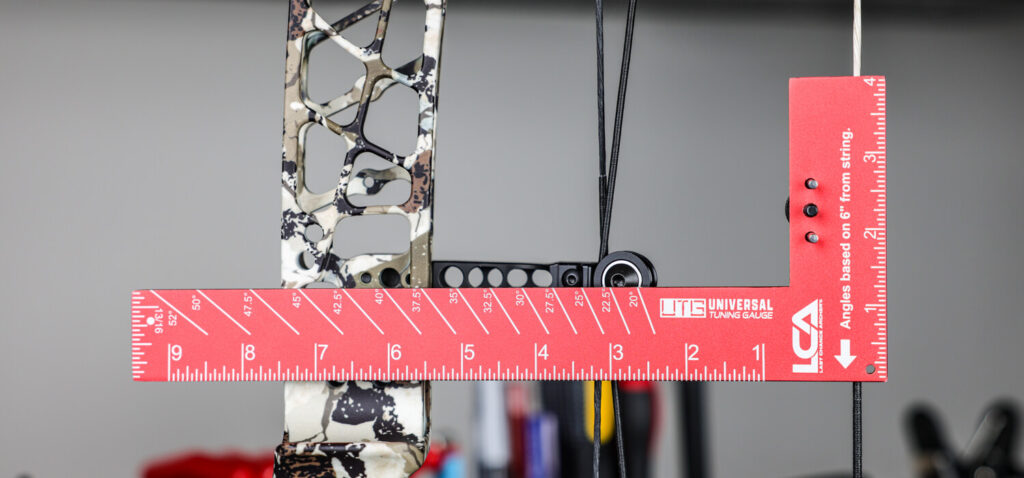
Measuring Brace Height
Place your bow in a bow vise, like the Revolution Vise.
Hold the UTG so that the string is inside the “arrow groove,” since the ruler markings measure from the center of the “arrow groove.”
Ensure the longer part of the UTG points outward toward the bow.
Adjust the UTG up or down the string until the ruler aligns with the throat of your grip.
You want to measure from the string to the deepest part of your grip.
View the measurement when positioned to see your bow’s brace height.
Each Universal Tuning Gauge also functions as a standard bow square.
Videos

Axle-to-Axle vs Bow Fit (How to Choose the Right Bow Length)
Axle-to-Axle vs Bow Fit (How to Choose the Right Bow Length)
Axle-to-axle length is one of the most misunderstood factors when choosing a bow. In this video, we break down how to choose the right bow length and why tip-to-tip measurement gives a more accurate understanding of how a bow actually fits at full draw.
From string angle to anchor position and face contact, the differences can be significant—even between bows with similar axle-to-axle specs. If you’ve ever struggled with bow fit or wondered why one bow feels better than another, this explains why.
That’s where the Universal Tuning Gauge (UTG) comes in. Last Chance Archery developed the UTG to measure real-world bow fit—not just rely on catalog specs. It’s quickly becoming the new standard for evaluating setup and consistency.
The UTG allows you to:
Measure string angle with precision
Compare the peep height, anchor position, and facial contact
Reference key setup points like nock height and centershot
Evaluate true bow fit across different bows
If you’re serious about dialing in your setup or choosing the right bow length, this is a must-watch.

Universal Tuning Gauge Tricks, Tips, & Instructions
Get the most out of your Universal Tuning Gauge.
This in-depth Tricks, Tips, & Instructions video walks you through faster, smarter, and more consistent tuning.
Learn how to measure centershot, nock height, string angle, peep height, and more with precision—and see how the UTG makes pro-level tuning simple for any bow.
Introducing the Universal Tuning Gauge – Built for the Perfect Tune.
Precision, alignment, and repeatability — made simple. Centershot, string angle, peep height, and more — reliably measured. The UTG captures every essential detail for a perfect setup. Built for archers who demand accuracy.
Additional information
| Weight | 0.07 lbs |
|---|---|
| Dimensions | 12.5 × 1 × 4.8 in |
| Product Lead Time (Wks) | 1 |
Measure Every Angle. Perfect Every Shot.
From Peep to Paper — Precision Built In.
Dual Pointers. Infinite Accuracy.
20° to 52° String Angle Range.
Built-In 13/16" Center Shot Reference.
Align Nock, D-Loop, and Brace Height.
Measure blade angles with ease.
Precision tuning starts here.
Analyze Cam Lean. Verify Tiller. Tune Smart.
The All-In-One Gauge for Every Bow.
- Durable, scratch-resistant coating
- Solid aluminum build
- Clear, precisely laser-etched markings
- Strong and long-lasting hardware and accessories
Additional information
| Weight | 0.07 lbs |
|---|---|
| Dimensions | 12.5 × 1 × 4.8 in |
| Product Lead Time (Wks) | 1 |
Reviews
There are no reviews yet.
Related Products
Universal Tuning Gauge
The Universal Tuning Gauge is for serious archers and bow technicians. It’s…
$69.00
Arrow Wraps - Solid Series
Our solid color arrow wraps deliver a clean, consistent look while maintaining…
$25.50
Arrow Wraps - Tactical Series
Tactical Series arrow wraps feature darker, subdued colors inspired by popular bow…
$25.50
Arrow Wraps - Ignite Series
Ignite Series arrow wraps feature bold, high-visibility colors inspired by popular bow…
$25.50

FlightPaper
FlightPaper rolls are designed for precise paper tuning—producing clean, visible tears that…
$34.00
FlightCheck
Paper tuning shouldn’t be a chore—it should be simple, accurate, and efficient.…
From: $289.00
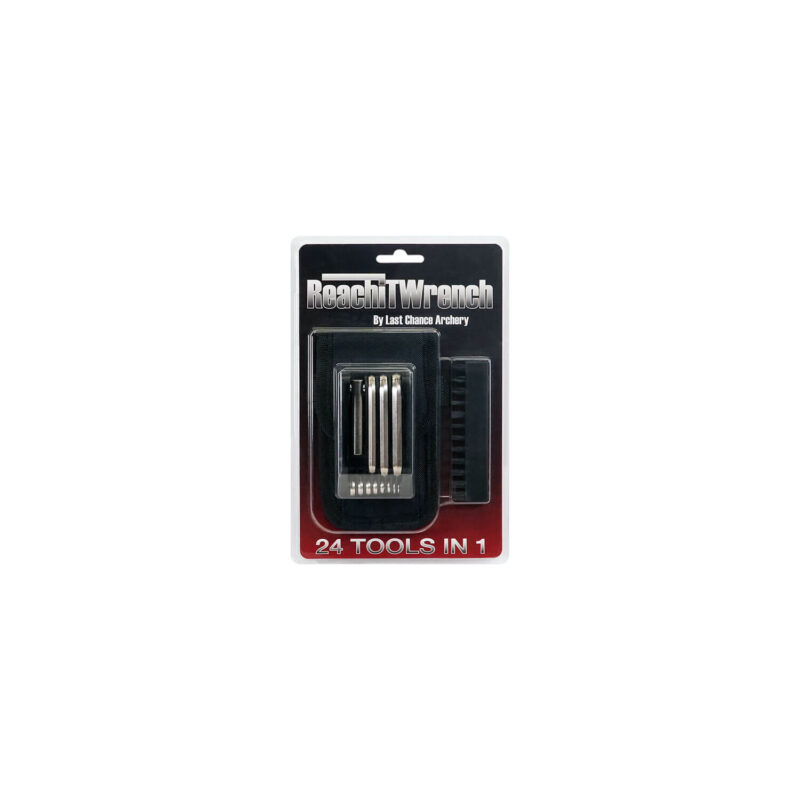
ReachIt Wrench
The ReachIt Wrench from Last Chance Archery is a compact, all-in-one solution…
$39.00
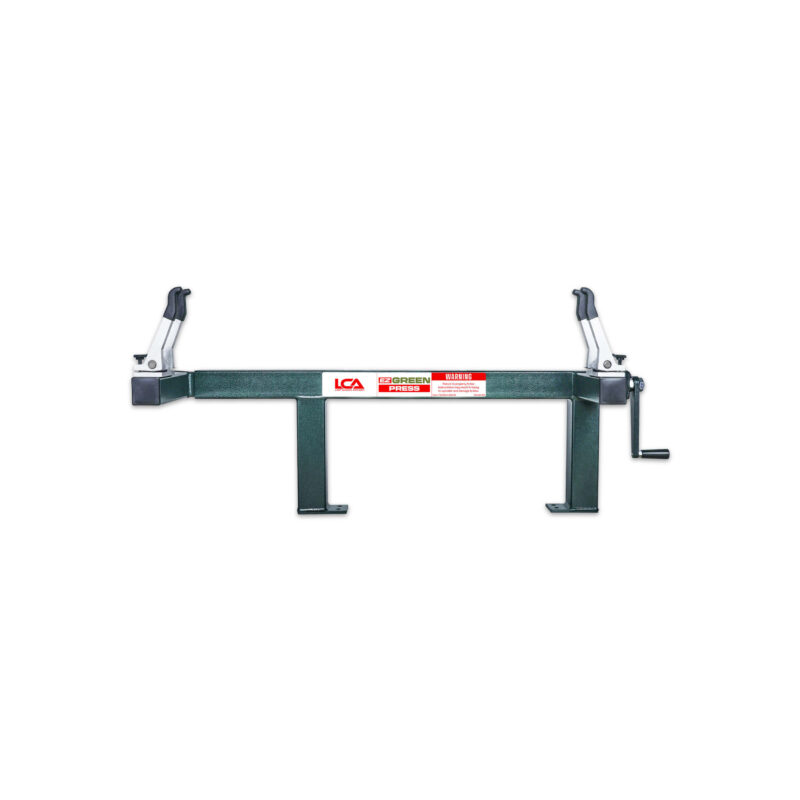
EZ Green Press
The EZ Green Press is designed for individual consumers, making it ideal…
From: $479.00
WrapWorks Mat
The WrapWorks Mat is a specially designed work surface for arrow customization,…
$20.00 $15.00
Precision Flex Cutter
The Precision Flex Cutter is a universal wrap-cutting tool designed to deliver…
$18.00 $13.50
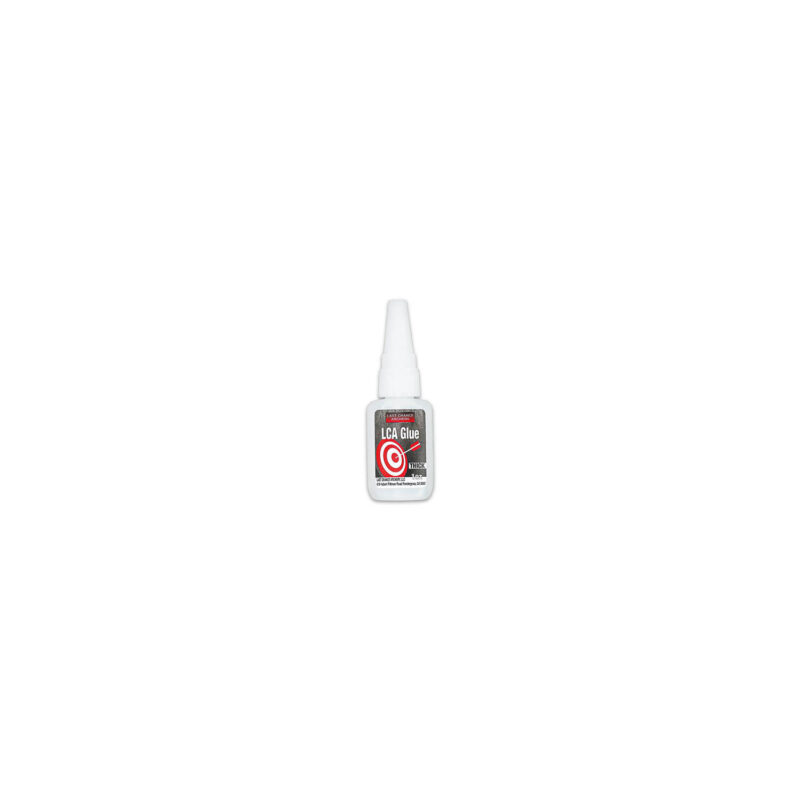
LCA Arrow & Vane Fletching Glue
LCA Glue is a high-performance adhesive specially formulated for archery and various…
$14.00
LCA Arrow & Vane Fletching Glue Activator
LCA Activator is a versatile product designed to enhance the fletching process…
$16.00
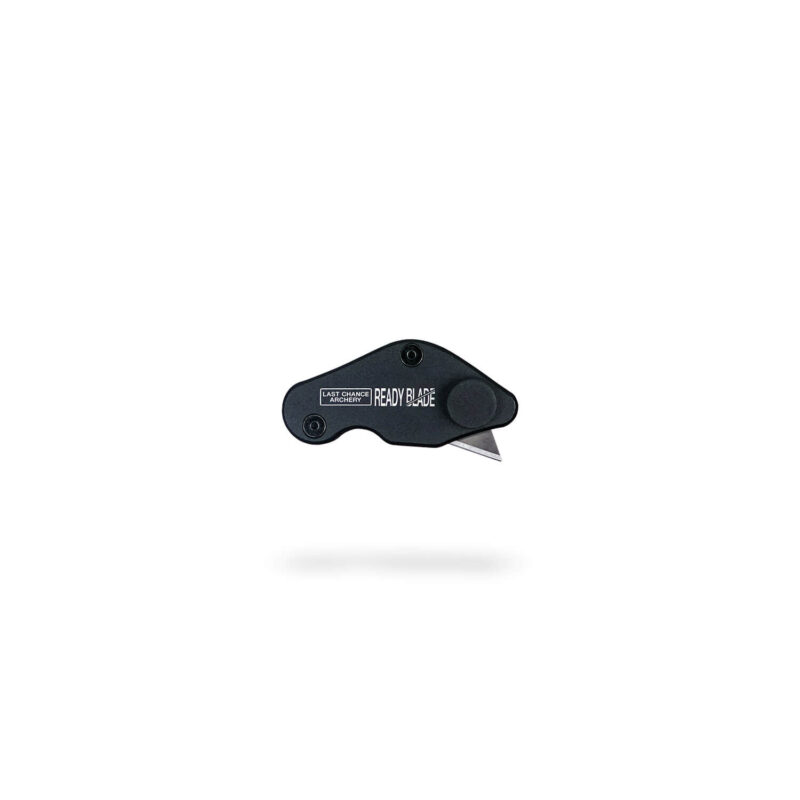
Ready Blade
The Ready Blade is a precision knife purpose-built for archers—perfect for cutting…
$24.00

FlightCheck - Floor Stand
The FlightCheck - Floor Stand offers a stable, free-standing base for the…
$154.00
FlightCheck - Vise Mount
The FlightCheck - Vise Mount transforms your FlightCheck into a compact, highly…
$49.00
Pocket Shop
The Pocket Shop is a compact 20-in-1 multi-tool, specifically engineered for outdoor…
$29.00
Precision Arrow Prep Kit - Bench Mount
The Precision Arrow Prep Kit is ideal for archers who build arrows…
$52.00

Precision Arrow Prep Kit - Handheld
The Precision Arrow Prep Kit is ideal for archers who build arrows…
$32.00
Replacement - Precision Flex Cutter Blade
Keep your Precision Flex Cutter running smoothly with authentic replacement blades. Made…
$7.00 $5.25

Reviews
There are no reviews yet.